## Progressive <br>Web ~~Apps~~ Maps (PWA) Malcolm Meyer GIS Specialist | [City of Zanesville](https://gis.coz.org) <aside class="notes" data-markdown> I have been at the City of Zanesville for about a year, before that I had a host of other GIS positions and have been in the GIS field for almost ten years. Also, I am not a developer, but I do play one at work. </aside> --- ## Introductions Your GIS origin story in two minutes or less... <aside class="notes" data-markdown> Notes: I graduated from the College of Wooster with a degree in Sociology and Urban Planning, and after several years in AmeriCorps I decided to go back to school to get my master's degree in International Affairs. I took several geography courses in graduate school at Ohio University, and that is where I got interested in GIS. </aside> --- ## Goals <ul style="none;"> <h4><img src="presentation/checkbox-blank.svg" >Quick Overview of PWAs</h4> <h4><img src="presentation/checkbox-blank.svg" >Create a Basic Web Map</h4> <h4><img src="presentation/checkbox-blank.svg" >Turn this Map into a PWA</h4> <h4><img src="presentation/checkbox-blank.svg" >Make the PWA Installable</h4> <h4><img src="presentation/checkbox-blank.svg" >Allow the PWA to be used Offline</h4> <h4><img src="presentation/checkbox-blank.svg" >Host & Install the PWA</h4> </ul> --- ## Time Allowing <ul style="none;"> <h4><img src="presentation/checkbox-blank.svg" >Add a Vector Tiles Basemap</h4> <h4><img src="presentation/checkbox-blank.svg" >Add Overlay Layers</h4> </ul> --- ## What is a PWA > Set of components to allow a website to behave more like a native application <aside class="notes" data-markdown> Notes: there are many examples of PWAs in the wild and we will look at some of those later, but it is important to note that as with all web technologies, browser support is varied and the tools to work with PWAs are rapidly changing. </aside> --- ## Benefits Native App Behaviors Custom App Colors Caching & Offline Support *Push Notifications <aside class="notes" data-markdown> Notes: We will not cover push notifications in this presentation, as that requires a separate server or service. There is a wealth of information online if you are interested in going further with PWAs. </aside> --- ## Multi-Platform Android Chrome Chromebooks iOS Windows Store --- <iframe src="https://www.pwastats.com" width="100%" height="500px"></iframe> <aside class="notes" data-markdown> Notes: PWA Stats highlights some popular PWAs. Before we get into building our own PWA, let's look at how the Chrome Dev Tools can be used to test out PWA functionality using the website petlove.com.br. </aside> --- ## Petlove PWA 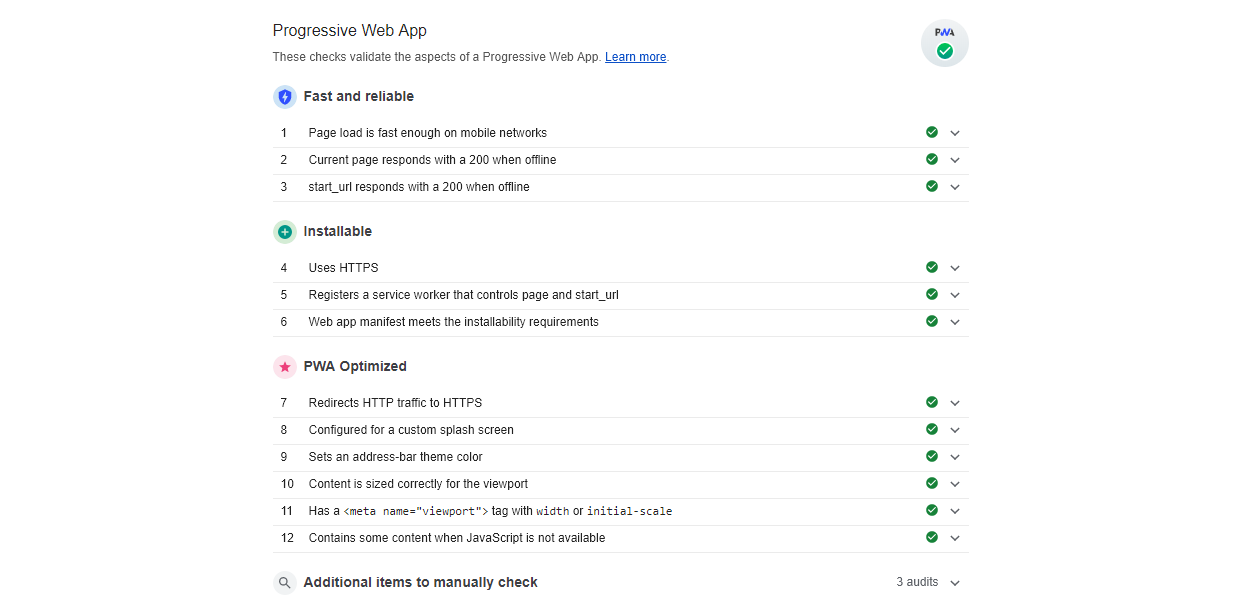 --- ## Why a PWA Map? * Cached Assets for Landing Pages & Map UI * Offline Maps for Field Use - No App Required * User Convenience - App Drawer/Homescreen <aside class="notes" data-markdown> Notes: So why would we want to bring this PWA functionality to web maps? First, it can give us more control over the caching of static assets like CSS and JavaScript in our maps or map portals. Also it can allow us to create installable applications without the user needing to download a separate app. Now let's look at how the sample PWA map I built for this workshop looks and take a look at the install process. </aside> --- ## Example PWA Map [https://pwa-trails.netlify.com](https://pwa-trails.netlify.com) <iframe src="https://pwa-trails.netlify.com" width="100%" height="400px"></iframe> <aside class="notes" data-markdown> Notes: This is a very basic web map, showing the various trails in one of the Franklin County MetroParks. What's different about this map is that it is a fully functional Progressive Web App. It can be installed on any device and used completely offline. The park already has paper maps, but of course a paper map does not give you the ability to show your GPS position while you're hiking the trails. Also, this area has very bad cell service, so having a map that can work offline is very important. I was actually a park ranger here for a short time, and in those two years we did have someone get lost on the trail. If they would have had a map such as this, it might have been easier for them to find a way out on their own. Now let's look at the install process for this app. </aside> --- 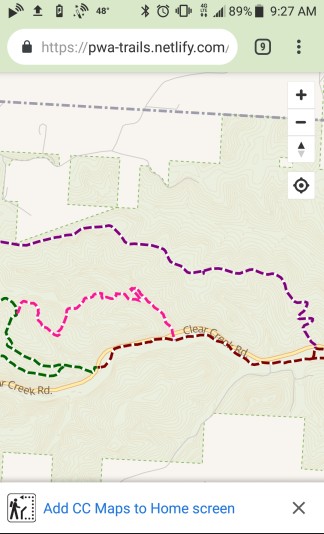 <aside class="notes" data-markdown> Notes: This is how the install process looks on an Android device. To get the install prompt on other devices you will have to write some additional JavaScript code. </aside> --- 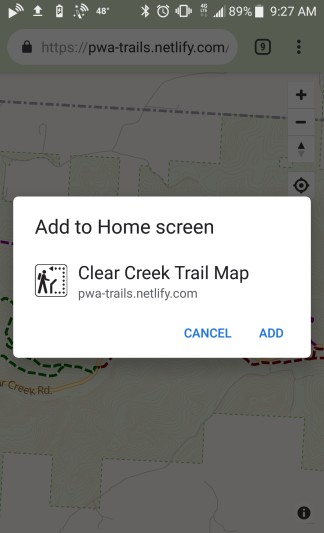 --- 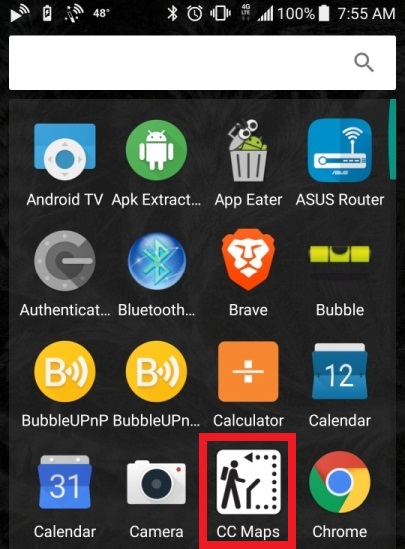 <aside class="notes" data-markdown> Notes: Here you can see the app is actually listed in the app drawer in addition to the home screen. This can make it a lot easier for users to get to your application. </aside> --- 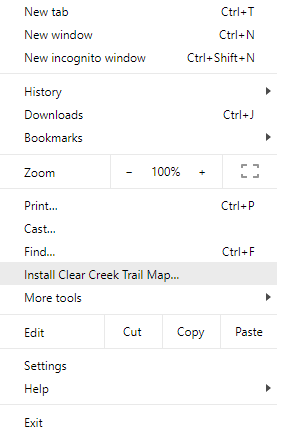 <aside class="notes" data-markdown> Notes: This is how you would go about installing this app in windows from Chrome. </aside> --- 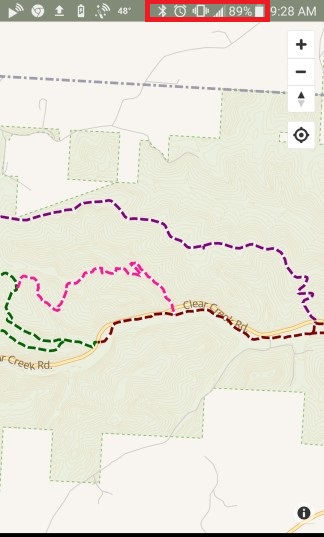 <aside class="notes" data-markdown> Notes: Here you can see that, as outlined in red, the app is completely offline, but is still usable. </aside> --- 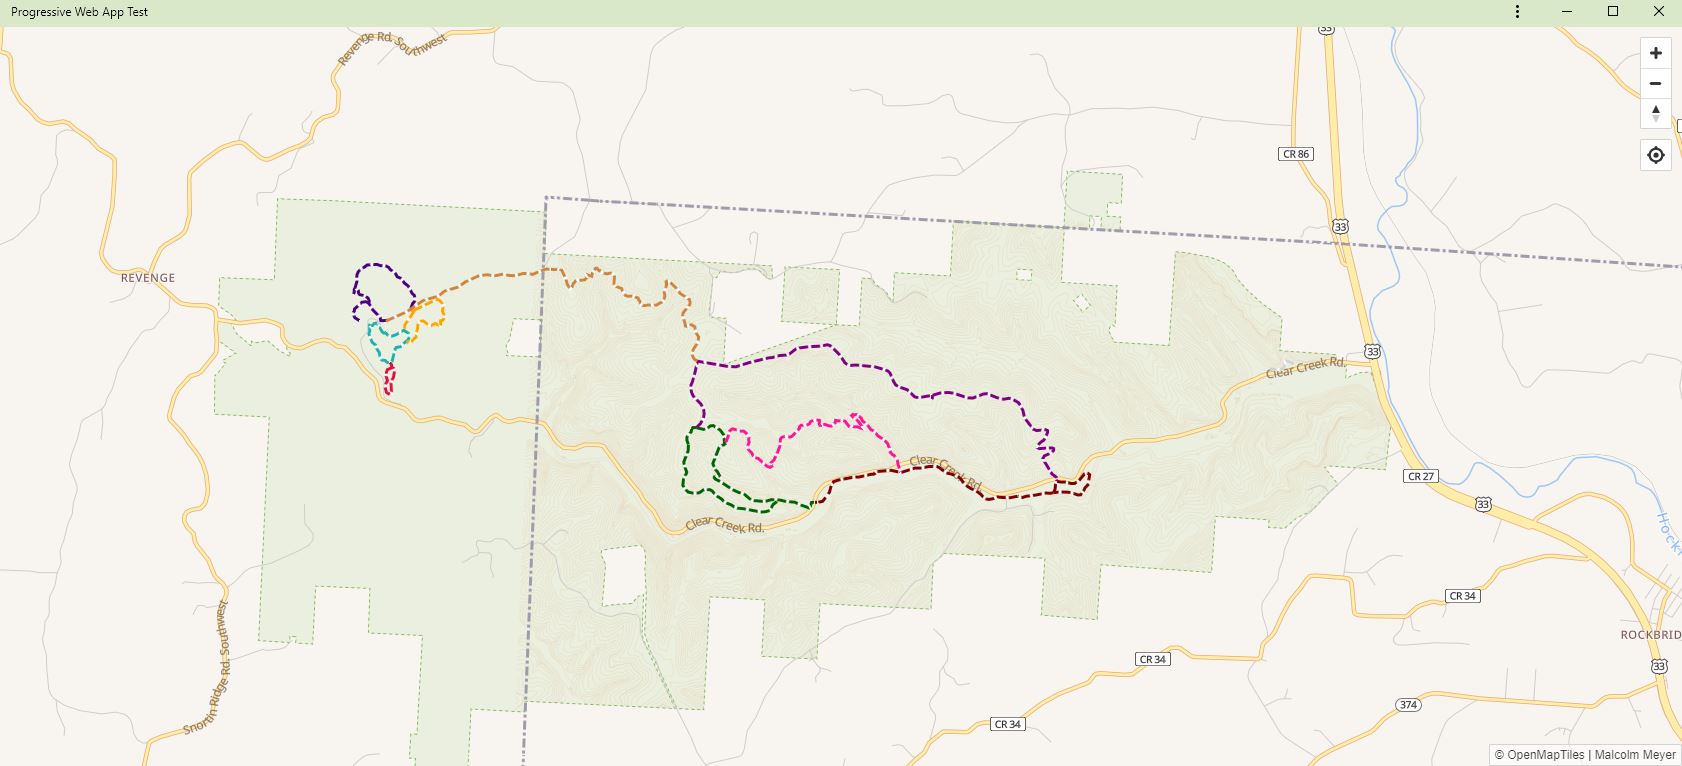 <aside class="notes" data-markdown> Notes: And here is the app as it looks launched from the windows desktop as a standalone PWA. </aside> --- ## Code Break <aside class="notes" data-markdown> Notes: https://www.smashingmagazine.com/2016/02/making-a-service-worker/ </aside> --- ## Step 1. Install <pre><code class="lang-javascript"> /* https://github.com/reyemtm/pwa-maps/archive/master.zip unzip and then open this folder in with VS Code CTRL + '`' to open the terminal */ npm install npm run build npm start </code></pre> <aside class="notes" data-markdown> Notes: First we need to download the GitHub repository for this project. Then we will install the dependencies. Finally we will build the very basic web map and run it through a PWA audit to see how it fares. The app will be located in the 'public' folder. Now when your app launched, if it did not launch in Chrome, please copy the url and open that url in Chrome. You should have a map that looks like this - next slide. </aside> --- 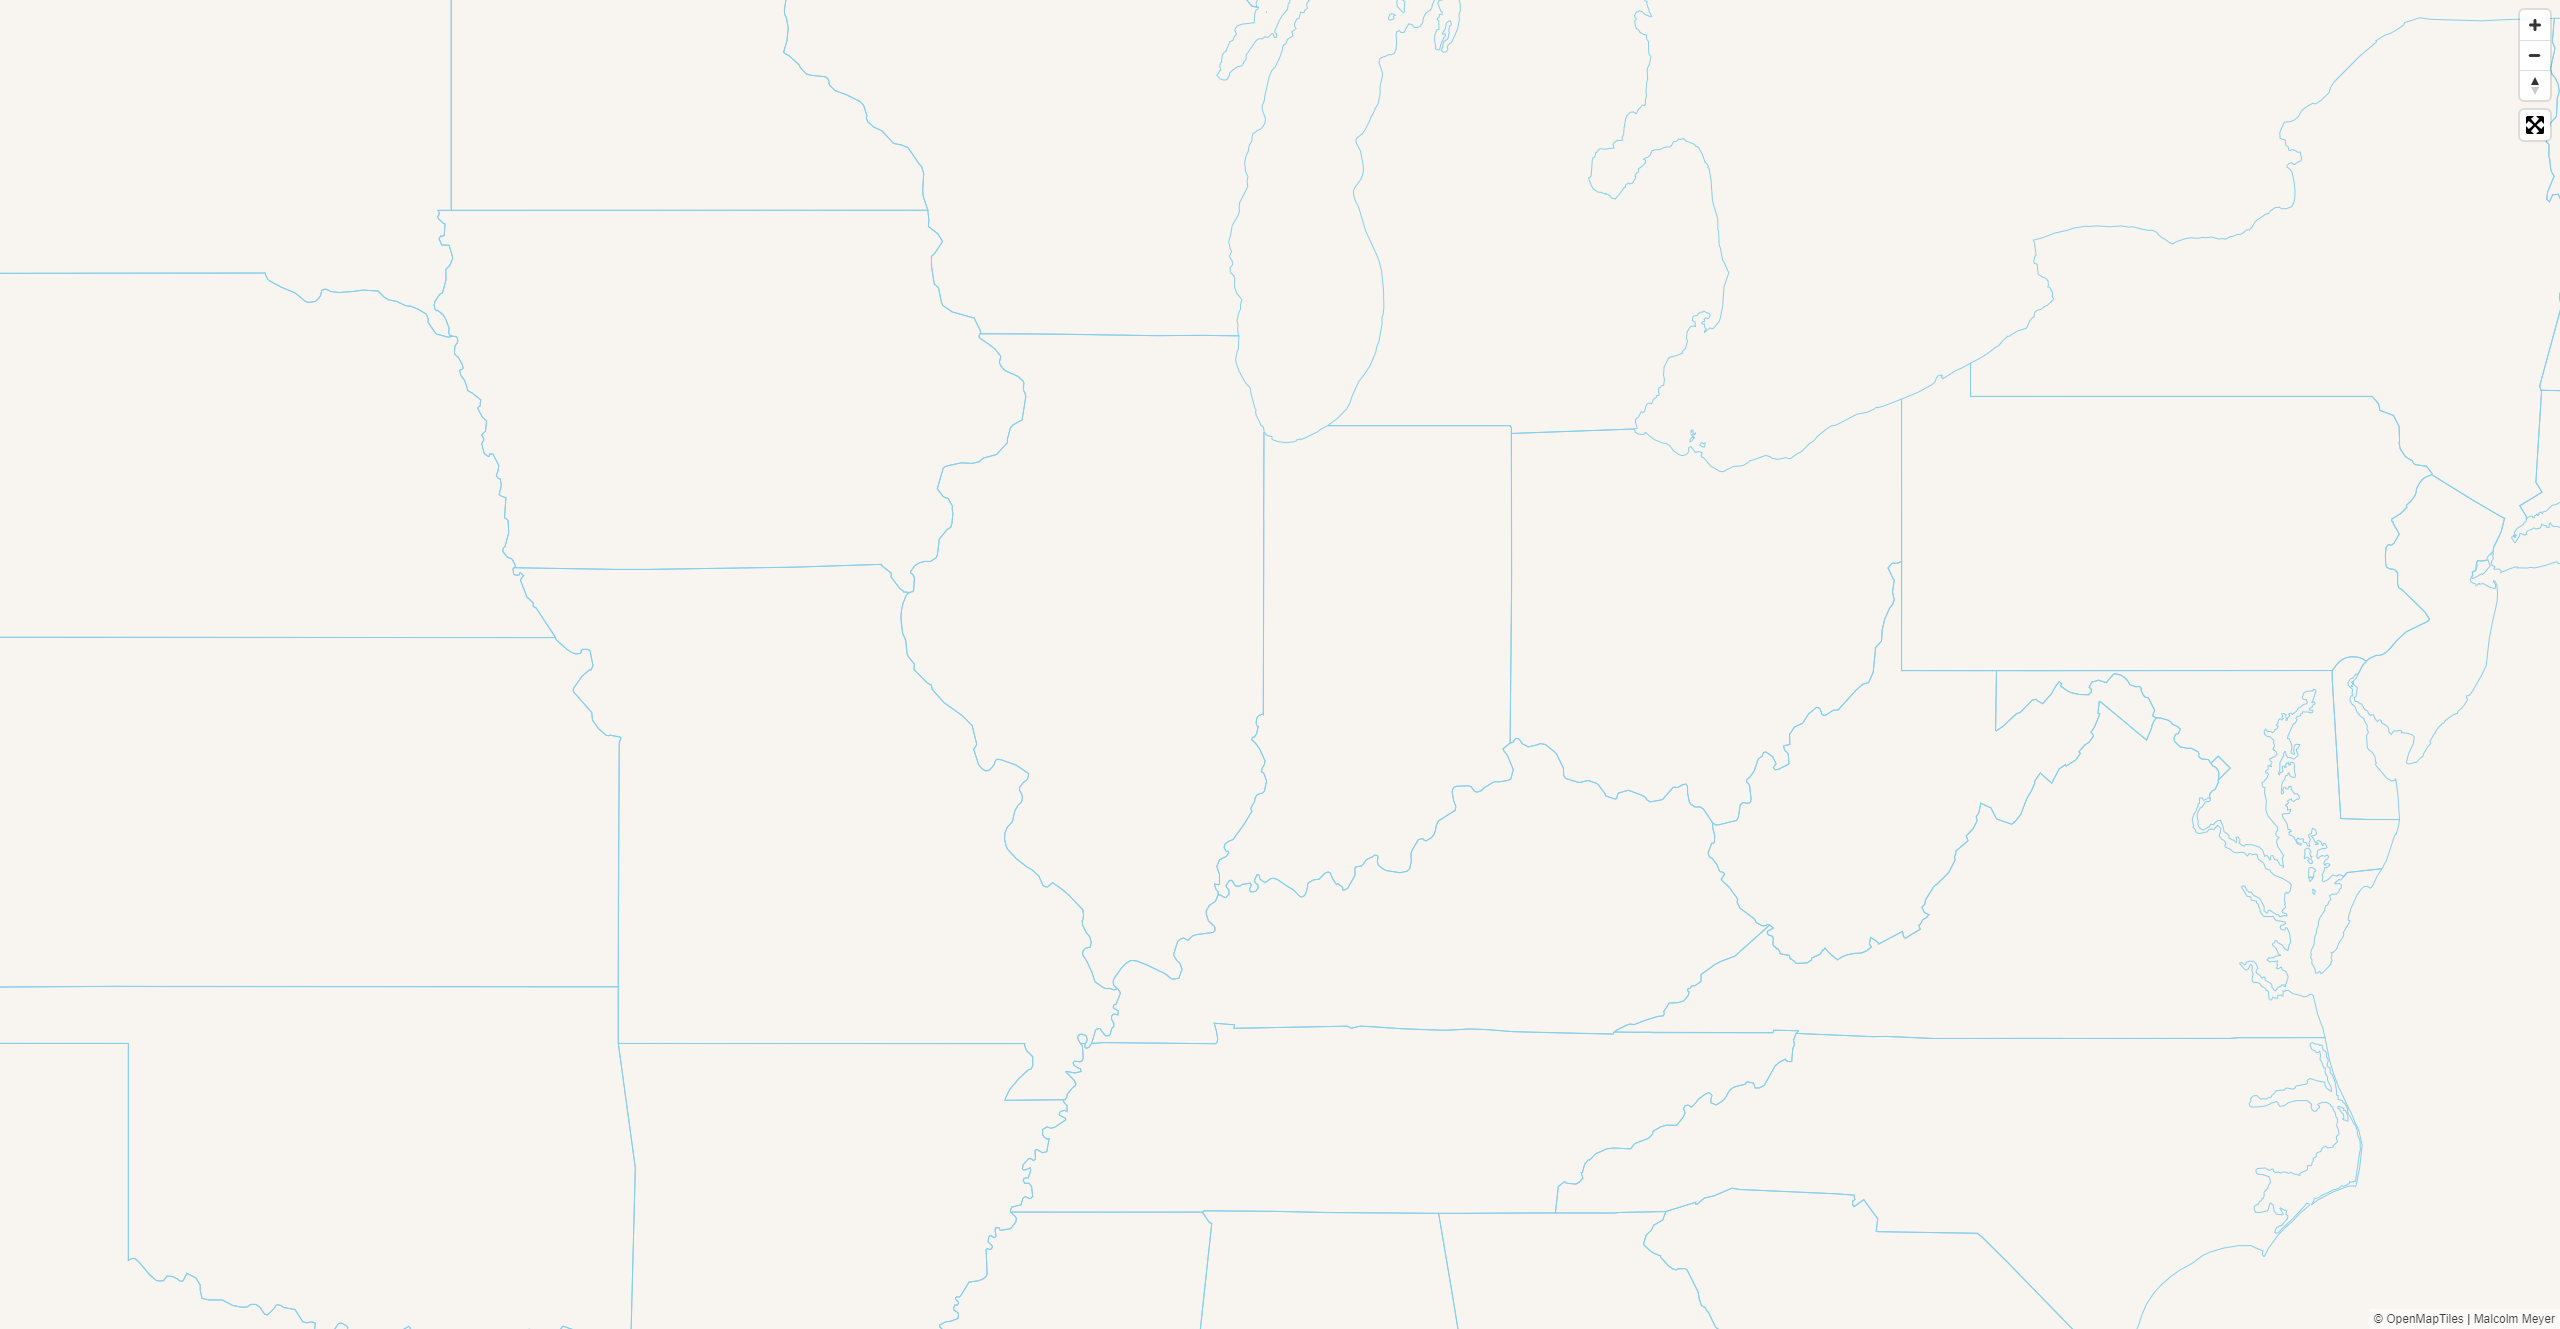 <aside class="notes" data-markdown> Notes: We have a basic web map. This map is using Mapbox GL JS as the mapping API, and we are not going to go into depth in learning this API. The documentation online is very good and can get you started with mapping using Mapbox GL JS. So now that we have a working map, let's run it through the same PWA audit that we ran the PetLove site through. When we run the map through the PWA audit, while we do get some positive results, it is missing the key features of a PWA: the manifest.json and service worker. </aside> --- ## Step 2. Test <code>//CTRL + SHIFT + i then Audit Tab</code> * Progressive Web App Audit in Chrome * Check 'Offline' in the Application Tab <aside class="notes" data-markdown> Notes: So again we are going to do the PWA Audit in Chrome as well as test the offline capability. </aside> --- ## <span style="color:firebrick;">Errors!!</span> * No manifest * No service worker * App does not work offline --- ## Goals <ul style="none;"> <h4><img src="presentation/check.svg" >Quick Overview of PWAs</h4> <h4><img src="presentation/check.svg" >Create a Basic Web Map</h4> <h4><img src="presentation/checkbox-blank.svg" >Turn this Map into a PWA</h4> <h4><img src="presentation/checkbox-blank.svg" >Make the PWA Installable</h4> <h4><img src="presentation/checkbox-blank.svg" >Allow the PWA to be used Offline</h4> <h4><img src="presentation/checkbox-blank.svg" >Host & Install the PWA</h4> </ul> --- ## Let's Look at the Elements of a PWA - manifest.json - service-worker.js - Mobile First Design - Progressive Enhancement <aside class="notes" data-markdown> Notes: From the results of the audit we see that we need to add a manifest.json file and the service worker. These, along with a mobile first design and progressive enhancement, are the keys to a PWA. Since our application is a simple web map, we do not need to worry too much about the second two aspects here. We will focus on getting the core functionality of the PWA working. </aside> --- ## manifest.json <pre><code class="lang-json"> { "name": "Clear Creek Trail Map", "short_name": "CC Maps", "scope": "/", "start_url": "/", "icons": [ { "src": "/img/trails512.png", "type": "image/png", "sizes": "512x512" } ], "background_color": "#d8e8c8", "theme_color": "#d8e8c8", "display": "standalone" } </code></pre> <aside class="notes" data-markdown> Notes: https://tomitm.github.io/appmanifest/ Create a manifest.json file in your public folder, and give it a name, short name and colors. If you want to look for a new icon you can, and you can use the above link to take a 512x512 image and make all the appropriate sizes for your PWA. Let's take a short break while you create this file. You can create the entire file using the url if you prefer. Just remember to copy all the assets to you public folder. </aside> --- ## Test Again * Passes manifest tests * No service-worker * No offline support --- ## Service workers > ...intercept and handle network requests, including programmatically managing a cache of responses. --- ## sw.js <pre><code> /* Create an empty sw.js file in the root of 'public'. In your index.html you will already see the following code in the head of the document. */ <!--register the service worker--> if ('serviceWorker' in navigator) { navigator.serviceWorker .register('/sw.js') .then(function () { console.log("Service Worker Registered"); }); } </code></pre> --- ## <span style="color:#28a745;">Success!</span> * Installable * PWA optimized * Still no offline support <!-- .element: class="fragment" data-fragment-index="1" --> * No service worker caching <!-- .element: class="fragment" data-fragment-index="2" --> --- ## Adding Offline Cache [https://css-tricks.com/serviceworker-for-offline/](https://css-tricks.com/serviceworker-for-offline/) <pre><code> npm run cache /* this will simply copy a prepared sw.js file to the public folder */ </code></pre> --- ## Examining the Events <pre><code> /* the cache is added after the install event */ 6 self.addEventListener("install", function(event) { /* requests are fulfilled with the cache, then the network */ 38 self.addEventListener("fetch", function(event) { /* when a new sw.js is activated the cache is refreshed */ 141 self.addEventListener("activate", function(event) { </code></pre> <aside class="notes" data-markdown> Notes: take a look at the service worker file and go through the various functions </aside> --- ## Service Worker Test * Installable * PWA optimized * Offline support * But that's not much of a map...<!-- .element: class="fragment" data-fragment-index="1" --> * And that's a lot of code <!-- .element: class="fragment" data-fragment-index="2" --> --- ## Workbox Automate the creation of the service worker <pre><code> npm install workbox-cli # this is already installed npm run workbox-wizard # workbox wizard npm run workbox-cache # workbox generateSW workbox-config.js #you could use the native cli commands if installed globally </code></pre> <aside class="notes" data-markdown> Notes: I just added some simple node scripts to run the workbox-cli without needing to install it globally. Workbox replaces the now deprecated sw-precache tool, also by Google. Now we can examine this new sw.js file. All the event logic is taken by an separate Google script. The sw.js file simply lists the cached assets. </aside> --- ## Creating the Basemap * Use raw vector tile files * Use GeoJSON for any additional map layers --- ## OpenMapTiles 1. Download a prepared OpenMapTiles extract 2. Create a GeoJSON to clip the extract <!-- .element: class="fragment" data-fragment-index="2" --> 3. Install the mbtiles-extracts Node JS Package <!-- .element: class="fragment" data-fragment-index="3" --> 4. Edit it to allow for not passing in a property name <!-- .element: class="fragment" data-fragment-index="4" --> 5. Unpack raw vector tiles from mbtiles <!-- .element: class="fragment" data-fragment-index="5" --> - https://www.npmjs.com/package/mbtiles2ungzpbf <!-- .element: class="fragment" data-fragment-index="5" --> 6. Result is hundreds of small files which must be cached <!-- .element: class="fragment" data-fragment-index="6" --> --- ## Extract Sizes Cleveland Metro Area - 17 MB Cuyahoga County - 6 MB City of Columbus - 7.5 MB OVRDC Region (12 Counties) - 16 MB <aside class="notes" data-markdown> Notes: Is anyone familiar with vector tiles? OpenMapTiles provides tools to build custom extracts of OpenStreetMap and pre-built area extracts </aside> --- ## Copy the Basemap <pre><code> npm run copy /* this will copy the OpenMapTiles data, the basemap style and the trails GeoJSON data to the public folder */ </code></pre> --- ## Edit index.html Replace the blank style with "bright.json" <pre><code> var map = new mapboxgl.Map({ container: "map", style: "bright.json", hash: true, center: [-82.58844, 39.5933], zoom: 6 }); /* This will change your basemap, but will not add the trails layer. If we have time we will do that manually, otherwise you can work on this on your own.*/ </code></pre> --- ## Publish to Netlify **Delete the ``.netlify`` folder!!** <pre><code> npm run deploy /* login choose the public folder when asked */ </code></pre> --- ## Final Notes Once your site is live, replace ``http://127.0.0.1`` in your bright.json file with the secure url of your new site <pre><code> npm run workbox-cache npm run deploy </code></pre> --- ## Goals <ul style="none;"> <h4><img src="presentation/check.svg" >Quick Overview of PWAs</h4> <h4><img src="presentation/check.svg" >Create a Basic Web Map</h4> <h4><img src="presentation/check.svg" >Turn this Map into a PWA</h4> <h4><img src="presentation/check.svg" >Make the PWA Installable</h4> <h4><img src="presentation/check.svg" >Allow the PWA to be used Offline</h4> <h4><img src="presentation/check.svg" >Host & Install the PWA</h4> </ul> --- ## Thanks <h3>Malcolm Meyer</h3> [@getbounds](https://www.twitter.com/getbounds)